
Table of Contents
Harnessing the power of the sun to produce electricity is a smart and sustainable way to power your home. With South Africa’s abundant sunshine, installing a solar panel system at your home can help keep it running during load-shedding and significantly reduce your Eskom bills.
Switching to solar power for your residential electricity needs also reduces your family’s carbon footprint.
Whether installing rigid solar panels on your roof or using portable solar panels on the go, you’ll need to connect them to your portable power station or other balance of system.
Here’s how.
Wiring Solar Panels —The Basics
Connecting solar panels with cables — both to each other and to your portable power station or other balance of system — is essential in any commercially available photovoltaic system.
Using solar cells — usually made of monocrystalline or polycrystalline silicon — PV panels harness photons from sunlight and convert them into DC electricity using the photovoltaic effect.
The direct current is sent via cables or wiring to an inverter, where it’s converted to AC (household) electricity or stored in a solar battery as DC and converted to AC when discharged.
Most current solar panels use a Universal Solar Connector and are compatible with a wide range of other PV panels and components like inverters and portable power stations.
What’s the Difference Between Wiring Solar Panels in Series or Parallel?
In most modern solar panel arrays, the physical act of wiring multiple solar panels together is simple.
However, there is one essential decision you must make.
Given the layout of your solar panel array, the number of PV panels, and the electricity production outcome you’re trying to achieve, is it better to connect your panels in series or parallel?
Or a combination of both?
What does connecting solar panels in series or parallel mean?
It’s essential to note that wiring your series or parallel doesn’t automatically lead to increased power output.
In laboratory conditions, 2 x 400W solar panels wired in series will produce 800W of output.
The SAME 2 x 400W solar panels wired in parallel will produce the SAME 800W output.
So why does choosing how you connect your panels matter?
Read on to find out.
Series Wiring
For the purposes of this article, we will examine the pros and cons of connecting solar panels of the same rated power and model in series or parallel.
Depending on your configuration, a hybrid series/parallel wiring method may be optimal.
While mixing and matching PV panels from different manufacturers with varying specs is possible, it’s far more complicated than using multiple PV modules of the same model.
If you’re purchasing a new solar panel array, you’ll make your life significantly easier if you install multiple modules of the same model.
With EcoFlow rigid solar panels, for example, you have the option of 100W and 400W rated power modules, which can easily be connected in multiple configurations depending on your requirements.
As a bonus, the 400W rigid solar panel is eligible for a 25% tax credit against the purchase price of up to R15,000.
Here’s how to connect multiple PV modules like the 400W rigid solar panel in series.
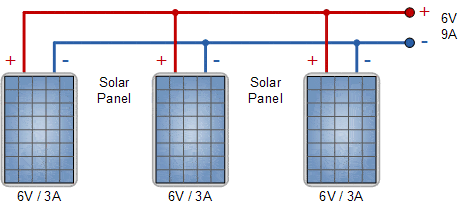
Connecting Solar Panels of the Same Model and Rated Power in Series

(Source: Alternative Energy Tutorials)
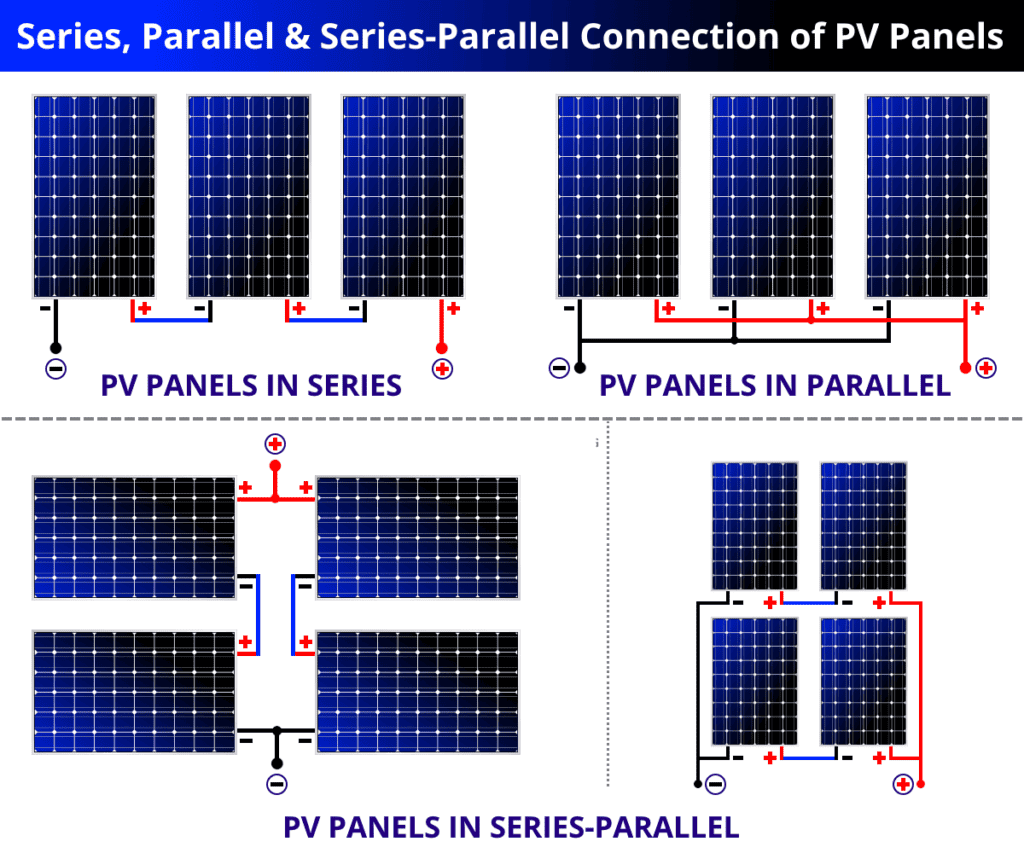
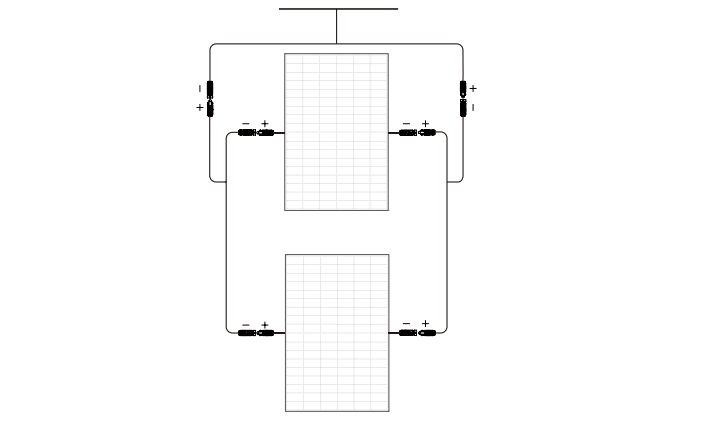
To connect your solar panels in series, wire the positive terminal to the negative terminal of each panel in the array. At the end, you’ll have a single positive/negative connection that will plug into your balance of system.
By wiring your solar panels in series, the output voltage of the array accumulates. In the diagram above, the output voltage of each panel is 6 volts. At the end of the series, the cumulative output is 18V (3 panels x 6V = 18V).
What’s crucial to note is that while the voltage output increases with each panel added to the series, the amperage remains the same.
Series connections are typically used for grid-tied systems that require a voltage of 24V or more.
Advantages
Voltage Accumulation: If your installation requires high voltage to operate — standard with on-grid systems — series or hybrid series/parallel wiring is probably essential. Even if it’s not, if your application is best served by higher voltage rather than amperage, a series connection is your best choice.
Efficiency and Performance: Without considering other factors, series connections will output slightly more electricity from the PV panel array than other wiring methods. There is less power lost delivering electricity over distance to your balance system in a series connection.
Thinner Cables: A relatively minor consideration, but parallel connections require higher gauge wiring due to how the electricity is transmitted. Series connections may cost slightly less to wire the same number of panels.
Better for Distance: Depending on the total surface area of your installation and how long the cables must be to connect to your balance of system, series connections may deliver an additional benefit. Voltage travels more efficiently than amperage over long distances.
Disadvantages
Obstruction and Shading: The most significant disadvantage of wiring solar panels in series is that the output of the entire array is dependent on the individual production of each module.
If you have 20 solar panels with a rated voltage of 6V each, the maximum potential output during peak sun hours is 120V. However, if just one module is in the shade (or damaged) and only produces 4V, the array’s output will be reduced to 4V per panel. Instead of 120V of production, your panels will output 80V. If part of your installation area suffers from significant shade during peak sun hours, you should consider parallel or hybrid connections instead.
Danger: High Voltage: There are many benefits to increasing the voltage output of your solar panel array. However, high voltage can be dangerous or deadly if improperly used. Working with high voltage also dramatically increases the risk for the person doing the installation. If you decide to proceed with a series connection, it’s best to hire a
professional installer.
Connecting Solar Panels of the Same Model and Rated Power in Parallel
(Source: Alternative Energy Tutorials)
Parallel Wiring
To wire solar panels in parallel, connect each panel’s positive terminals together. You also connect all the negative terminals to one another. Parallel wiring results in amperage accumulating and voltage remaining the same. The exact opposite effect of series wiring.
Again, using the same panels in the series example above, if the amperage per panel is 3V and you have 3 identical panels, your total output will be 9 amps (9A) and 6 volts (6V). The formula looks like this:
3A x 3 PV panels = 9A total output
Voltage doesn’t increase — the output remains 6V no matter how many solar panels you connect. If you have a 20-panel array connected in parallel with 6V/3A of rated power output, your maximum electricity production capacity is 6V/60A.
Advantages
Cumulative Increase in Current: Each PV panel you add to an array connected in parallel adds its direct current output to the system’s total output.
Less Overall Vulnerability to Shade: Unlike the voltage produced by series connections, the increased amperage (current) produced by parallel connections is not dependent on the performance of individual panels. If one PV panel is covered in shade for part of the day, the performance of the entire array is not affected. Shaded panels will contribute less current to the total output, but the maximum output of the panels receiving direct sunlight remains the same.
For example, if you have 20 panels that output 3A of current in peak sunlight, but two are covered in shade, reducing their output to 2A, the cumulative output of your array will be reduced by 2A. The total (theoretical) output is 58A instead of 60A because each shaded panel produces 1A less.
For many rooftop installations, the advantage of parallel wiring is obvious. Depending on your location and roof structure, substantial portions of your solar panel array may be regularly shaded by obstructions like trees and neighbouring buildings for part of the day.
But they may produce their full rated power at regular intervals, depending on the earth’s rotation around the sun.
If the panel’s positioning means it never or rarely gets direct sunlight, you should move it.
Solar panels still produce electricity from ambient sunlight on overcast days. But PV panels do not always produce their full-rated power.
Why?
PV panel performance depends entirely on the amount of solar irradiance (sunlight) it receives.
That’s why solar panels don’t “work” at night.
Investing in a mounted solar panel you know will consistently be in the shade makes little sense.
Constant Voltage: Unlike series connections, you can add additional PV panels without increasing the voltage. This makes parallel connections invaluable in applications that require 12V power input, like many motorhome and recreational vehicle systems.
Similarly, solar inverters have a maximum voltage capacity. You can add more PV panels to your array and continue using the same inverter. If you wired the same array in series and exceed the voltage capacity of your inverter, it will either shut down or permanently damage the component.
Disadvantages
Less Efficient: The larger your solar panel array, the more power you will lose to inefficiency. Parallel wiring leaks more energy over long distances than series connections.
Less Resistant to Heat: Believe it or not, solar panels suffer in the heat. Direct sun exposure is optimal for electricity production, but solar panel efficiency declines rapidly as the temperature rises above 25°C.
That’s because the photovoltaic effect used by solar cells captures energy from sunLIGHT, not from heat.
All solar inverters and balance of system components like PWM or MPPT charge controllers have minimum voltage requirements. If heat (or other factors) hinder solar panel efficiency to the degree that voltage output decreases below the minimum requirement, adding more PV panels wired in parallel will not solve the problem.
Thicker, More Expensive Cables: Amperage (current) flows through wires in a similar way to how water flows through a hose. The more current (water) you want to output, the bigger the cable (hose) has to be. Larger gauge wires are also less efficient at moving current over long distances. Parallel connections are typically better suited to smaller installations.
Series-Parallel Connections (Hybrid)
Connecting solar panels in series or parallel each has its pros and cons.
Can you have the best of both worlds?
Yes, many professional sizeable solar panel installations combine series and parallel wiring in one array to maximize the product of each group of panels.
It’s possible to strike the optimal balance between series and parallel wiring by carefully planning the wiring based on the location of the panels on the roof relative to the sun and obstacles that obstruct sunlight at certain times of day.
Typically, the goal is to achieve the right balance of producing volts and producing amps by wiring panels together in series and in parallel — not either/or.
If your residential solar installation will have more than 3 or 4 PV panels, it’s best to work with a professional installer. It will cost you more upfront but should substantially increase your return on investment and shorten your solar payback period.
For safety and performance reasons, we highly recommend that you DO NOT attempt hybrid series-parallel wiring of your solar panels on your own. Work with a reputable installer to achieve optimal results.
Some of the factors a solar power professional will consider when developing a wiring plan include.
- Desired electricity output
- Number and type of panels
- Peak sun hours at your location (how many and when)
- Direction, position, and angle of PV panels
- Any permanent obstacles to sunlight (trees and neighbouring buildings are common examples of fixed obstructions to direct sunlight)
- Average and extreme temperatures at your location
Involving an experienced installer in the process before buying your PV panels and balance of system can be an even better idea than just having them connect everything together.
The right installer can help you make an informed purchase decision and avoid common mistakes like buying too many solar panels or incompatible components.

How to Connect Solar Panels to Your Home in 7 Steps
If you’ve already purchased your solar panel array and balance of system and you’d like to install them yourself, here are X basic steps that apply to most residential photovoltaic systems.
The instructions should be used only as a summary of the basics of connecting solar panels to each other and your balance of system installation.
For example, you should NEVER attempt to install a grid-tied system without a licensed electrician. Likewise, don’t try to connect any solar or battery-powered system to your home circuit board or existing wiring. You will likely be breaking the law, and unless you’re a licensed electrician, working with high-voltage electricity can be a fatal mistake.
Furthermore, the similarity between home integration of on-grid and off-grid solutions pretty much ends after connecting your solar panels to each other and then to an inverter.
As discussed, with on-grid systems, you require a licensed electrician at this point.
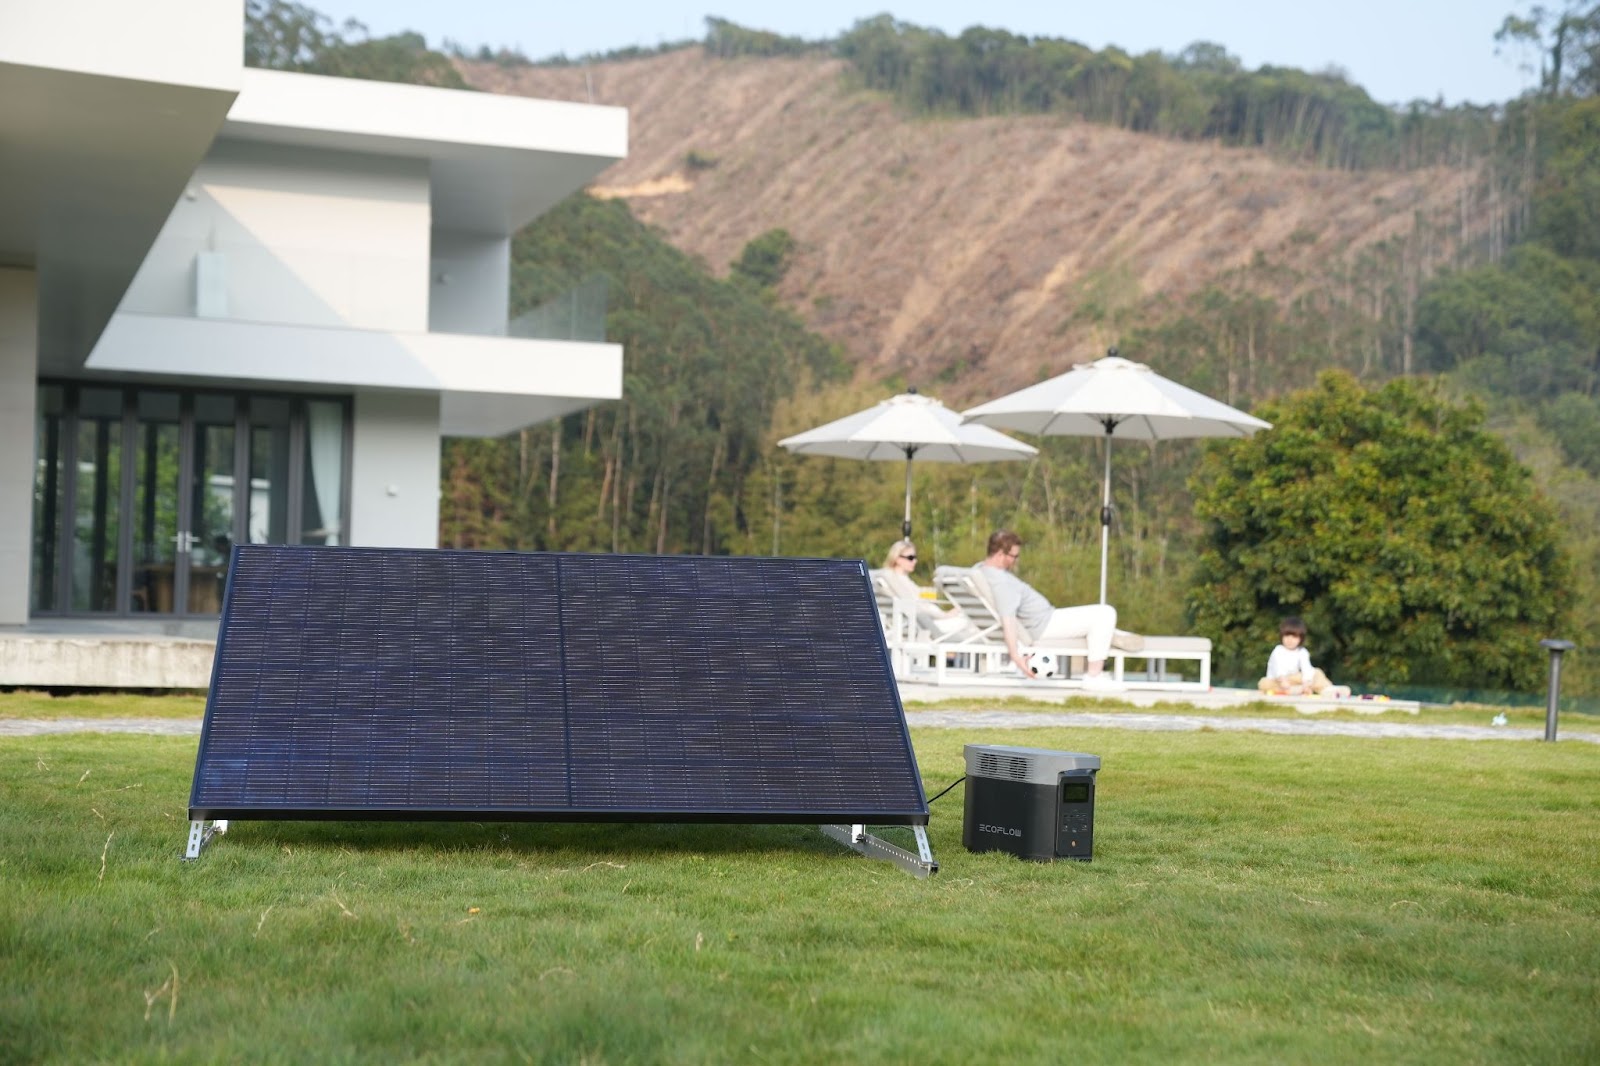
So, let’s focus on a more DIY off-grid solution and look at how to install the EcoFlow DELTA Pro with 4 x 400W rigid solar panels.
Step 1: Plan Your Layout
The ideal positioning and wiring for solar panel arrays is unique to every home.
Here are the essential factors to consider with an EcoFlow DELTA Pro + 4 x 400W rigid solar panels — many of which apply to any on or off-grid residential system.
- Available surface area for installation
- Average peak sunlight hours at your location
- Obstructions that will impact how much direct sunlight your PV panels receive on a daily basis
- Distance between each PV panel and the cable run from the last panel in the array to the inverter
- Ambient temperature (in South Africa, heat is the only concern)
- Direction, positioning, angle, and tilt
Step 2: Test Your Portable Power Station and Solar Panels
Unlike traditional residential solar power systems, EcoFlow’s portable power stations and solar generators have all the required balance of systems built-in, including:
- Solar inverter
- Solar battery (LiFePO4/Li-ion/Ni-Cad depending on model)
- MPPT solar charge controller
- Advanced battery management system (BMS)
Decide whether to connect your solar panels in series, parallel, or series-parallel. Parallel is often best for small systems of 2 or 3 PV panels. However, you must evaluate the optimal option for 4 x 400W rigid solar panels based on your location and other relevant conditions.
Testing your chosen configuration before installing the solar panels on your roof is essential. Preferably outside in direct sunlight. By doing so, you should avoid having to make adjustments once the panels are mounted on your roof.
With EcoFlow DELTA Pro, you can monitor how much electricity your PV panels produce on the LED display or with the EcoFlow smartphone app.
Whether you wired the panels in series, parallel, or series-parallel, they should produce between 75% – 100% of their rated power in direct early afternoon sunlight.
Remember, it’s to be expected that NO PV panel will produce 100% of its rated power at all times of day.
However, if the output is significantly less than 1600W (4 x 400W rigid solar panels), you should re-check your wiring and/or contact Ecoflow after-sales support.
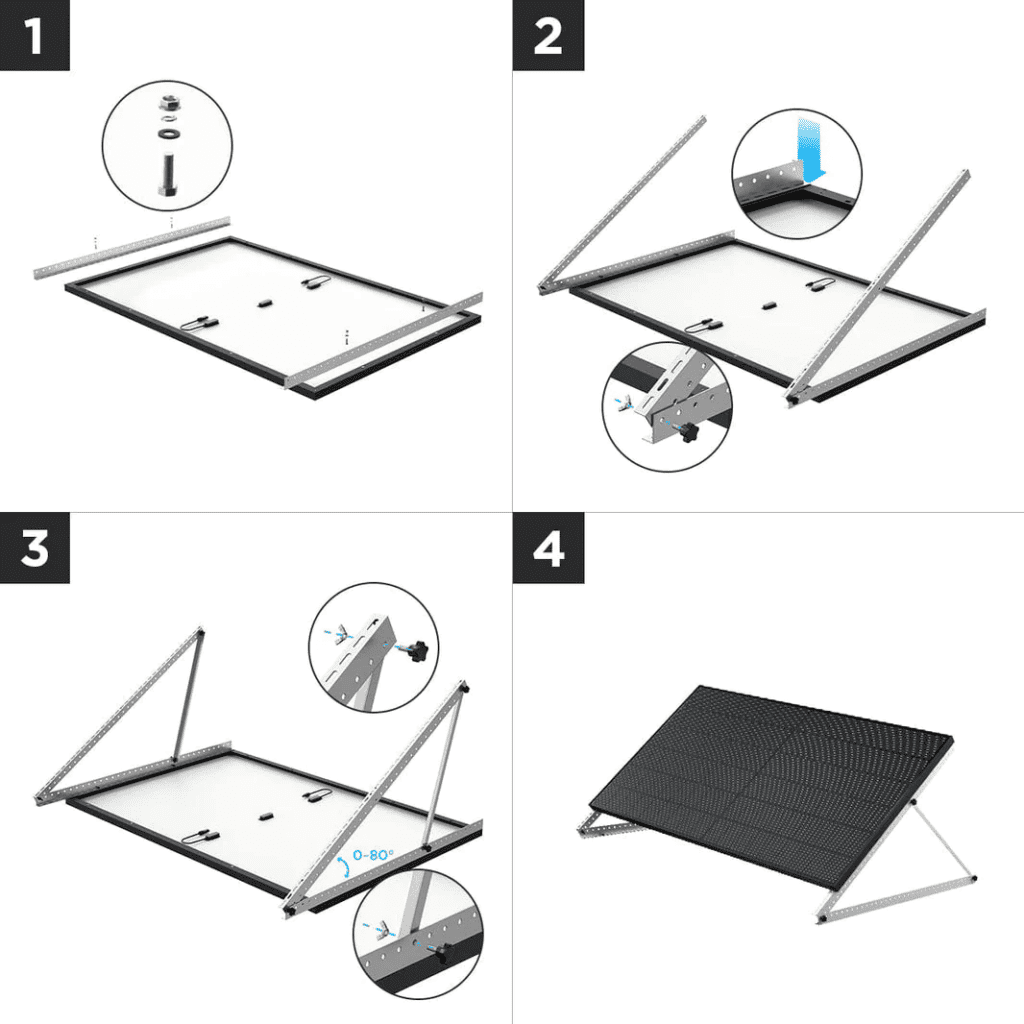
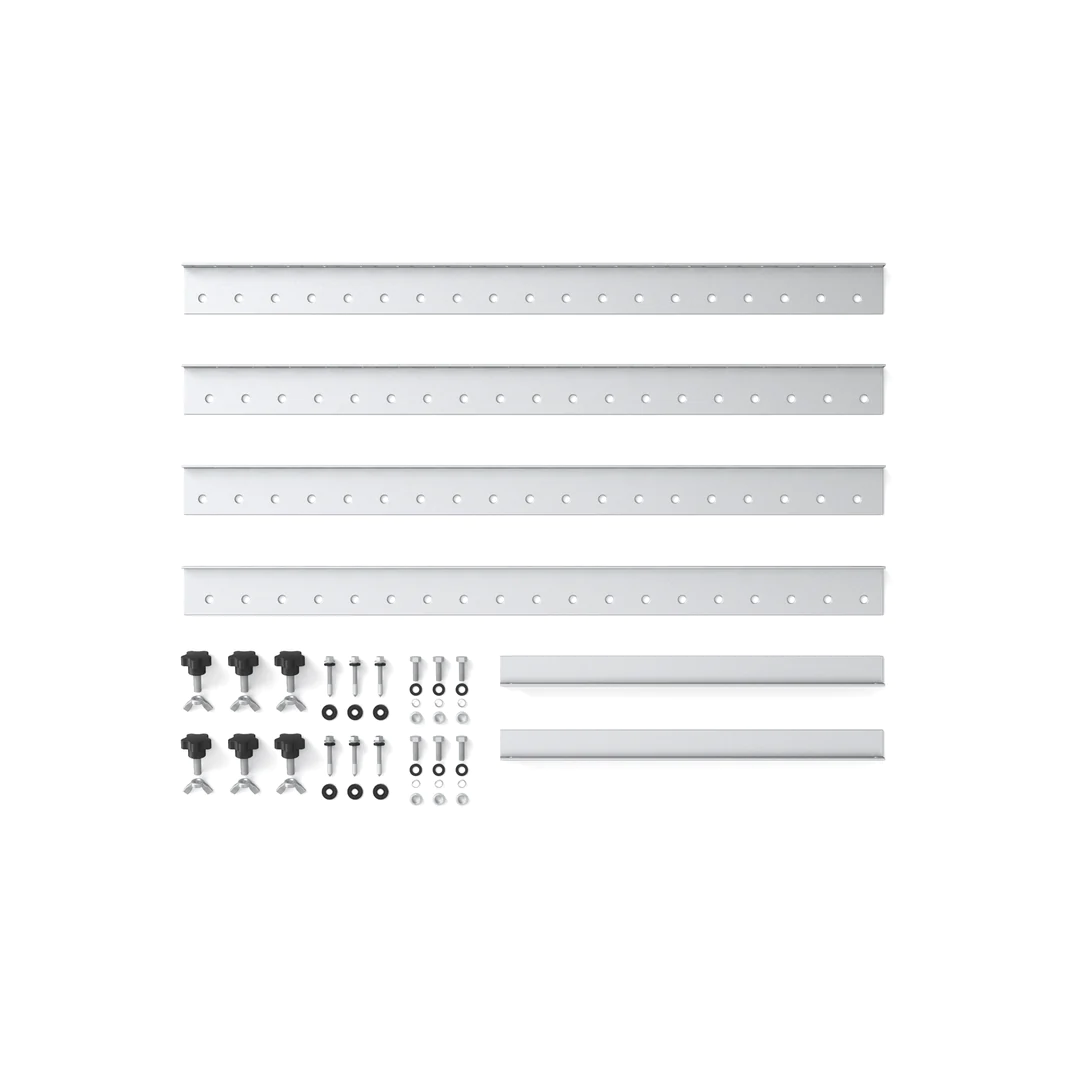
Step 3: Assemble Your Mounting Hardware
EcoFlow’s rigid solar panels come with 4 x solar mounting feet. But unless your roof is perfectly angled for maximum sunlight exposure, you will need additional hardware.
You can purchase optional EcoFlow 50” Tilt Mount Brackets directly from the manufacturer’s website. The 50” (127cm) Tilt Bracket is specifically designed to make mounting your 400W rigid solar panels on a rooftop (or any other flat surface) incredibly easy.
All you need is the following tools:
- Adjustable wrench (M8 and M12)
- Tape measure
- Safety glasses
- Work gloves
If you prefer a different method of mounting your panels, such as a racking system, EcoFlow 400W rigid solar panels are designed to work easily with most third-party mounting systems.
The Tilt Bracket is simply a painless option for mounting your PV panels and positioning them optimally on your roof.
Detailed assembly instructions are included with the brackets. Anyone with even minimal DIY experience can assemble this mounting hardware.
Just be careful up on the roof!
Step 4: Mount Solar Panels on Your Roof
If you’ve opted to mount the PV panels on the roof by yourself, the first step is to ensure you have a sturdy ladder and some help.
EcoFlow 400W Solar Panels weigh 21.8kg and have dimensions of 172.2cm × 113.4cm ×3.5cm. That’s a lot of bulk for one person to carry up a ladder safely.
Using the tilt brackets will add a bit of weight but may make the panels more manageable to carry.
Once you have all four panels on the roof, arrange them in the configuration you mapped out in Step 1.
Double-check again (with the panels on the roof) that your wiring plan is correct. The panels should be as unobstructed as possible by buildings, trees, and other obstacles that regularly blot out sunlight during the day.
The surface area of each panel is approximately 1.95 m2, and you should aim to leave between 15 and 20 cm of space between each module.
Additionally, you’re advised not to mount solar panels any closer to 31cm from the edge of your roof. There may even be building code requirements for minimum distance from the roof’s edge in your location.
Given the above factors, the approximate total surface area required for installation is about 10m2, allowing for 20cm spacing between panels.
Once satisfied that your positioning is optimal, secure the tilt mounts or mounting feet to the roof according to your roof type and the instruction manual.
Step 5: Connect Solar Panels in Series or Parallel
During Step 1, you should have already decided whether you’ll benefit most from connecting your PV panels in series or parallel.
Series Connection

For series connection, connect the positive pole of one module to the negative second, third and fourth modules correspondingly. A series connection between 4 solar panels could quadruple the voltage. Amperage and wattage output remain the same.
For relatively small installations like this one, connecting the panels in series is recommended. Since the surface area required for installation is only 10m2, it’s unlikely that the performance of one solar panel will diminish the performance of the other 3 modules.
Parallel Connection
For parallel connection, please connect the positive and negative cables of one module and the second module correspondingly. A parallel connection between 4 solar panels could quadruple the amperage. Voltage and wattage output remain the same.
If you’re worried about the current being too low, consider wiring the four PV panels in parallel. With a four-panel array, there’s no benefit to wiring it in series-parallel.
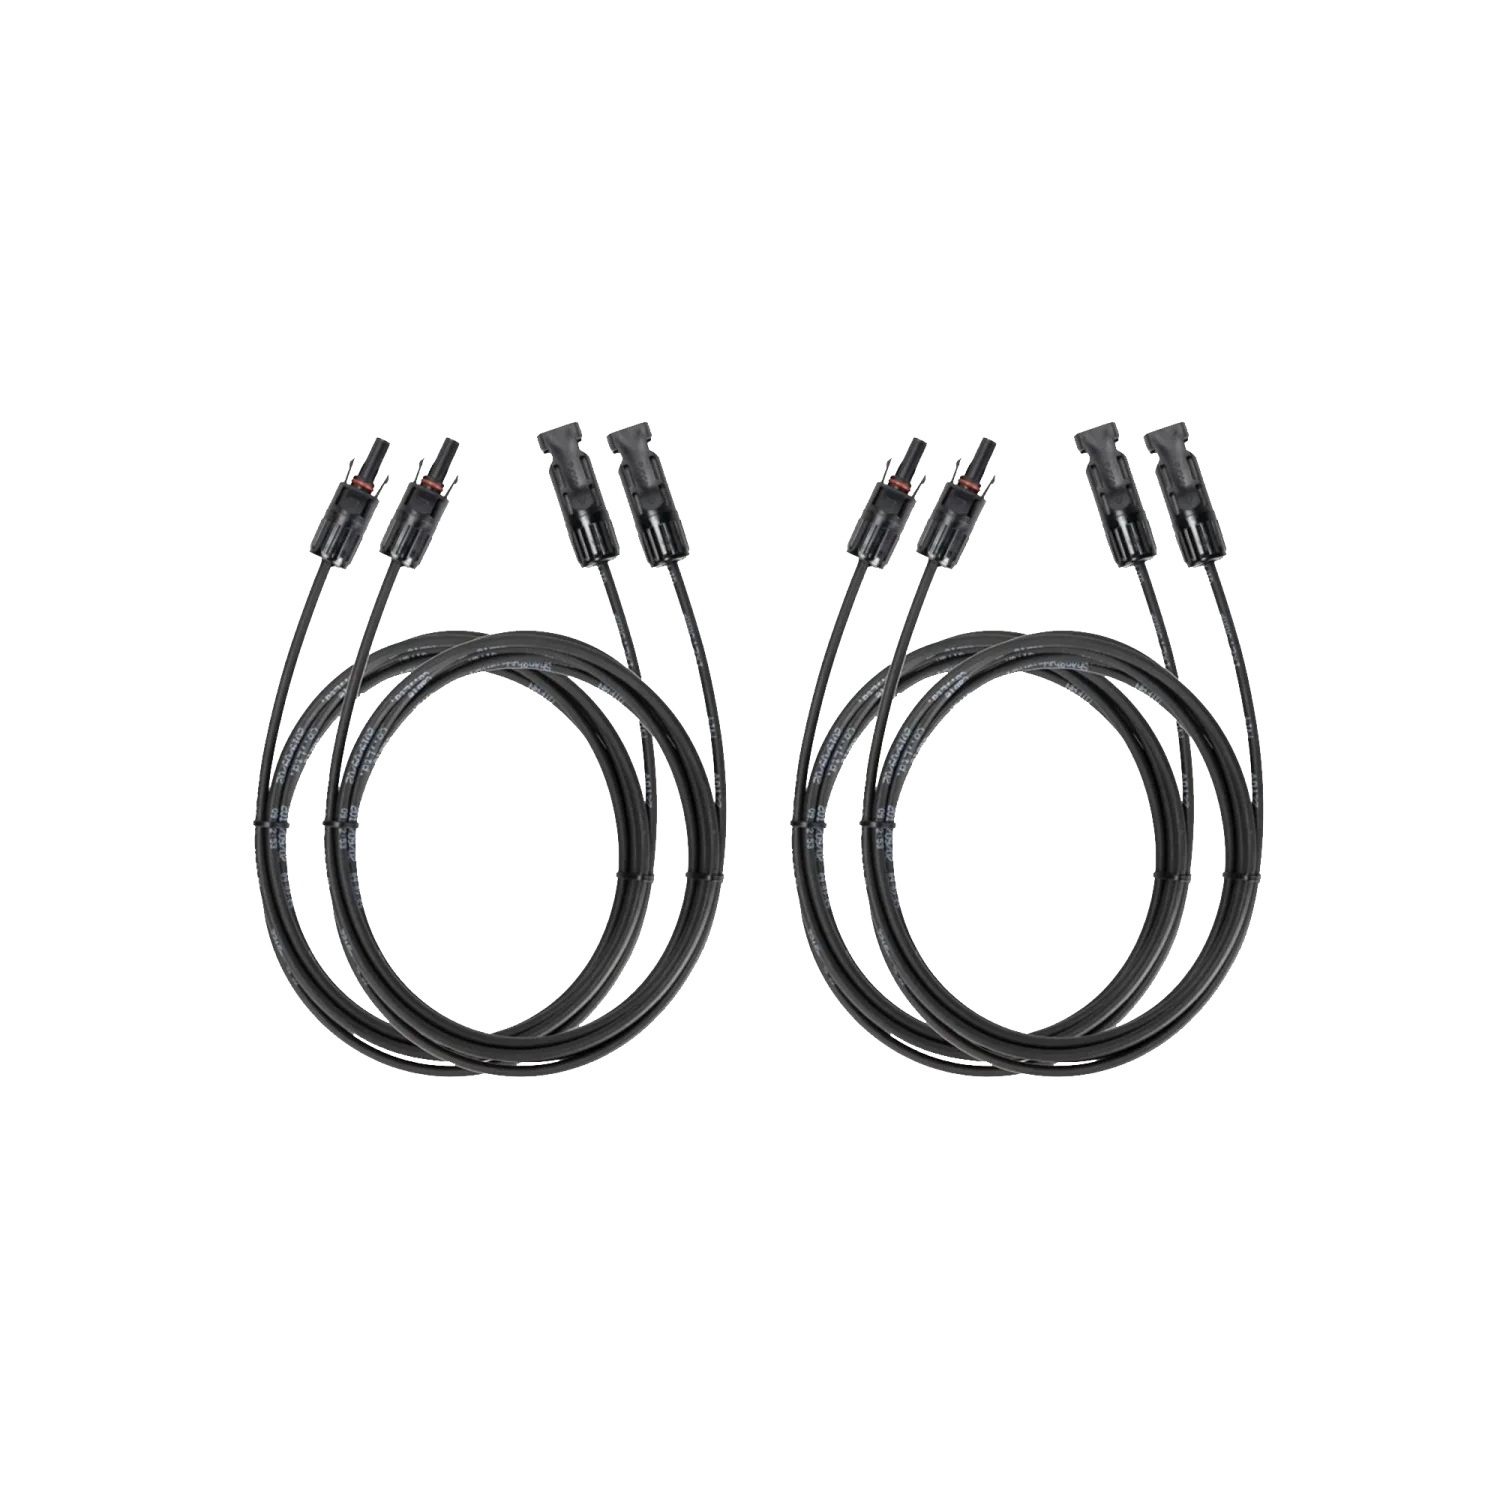
Whether you opt for series or parallel, you’ll require additional cables. The exact number depends on your installation, but you’ll likely need several solar extension cables.
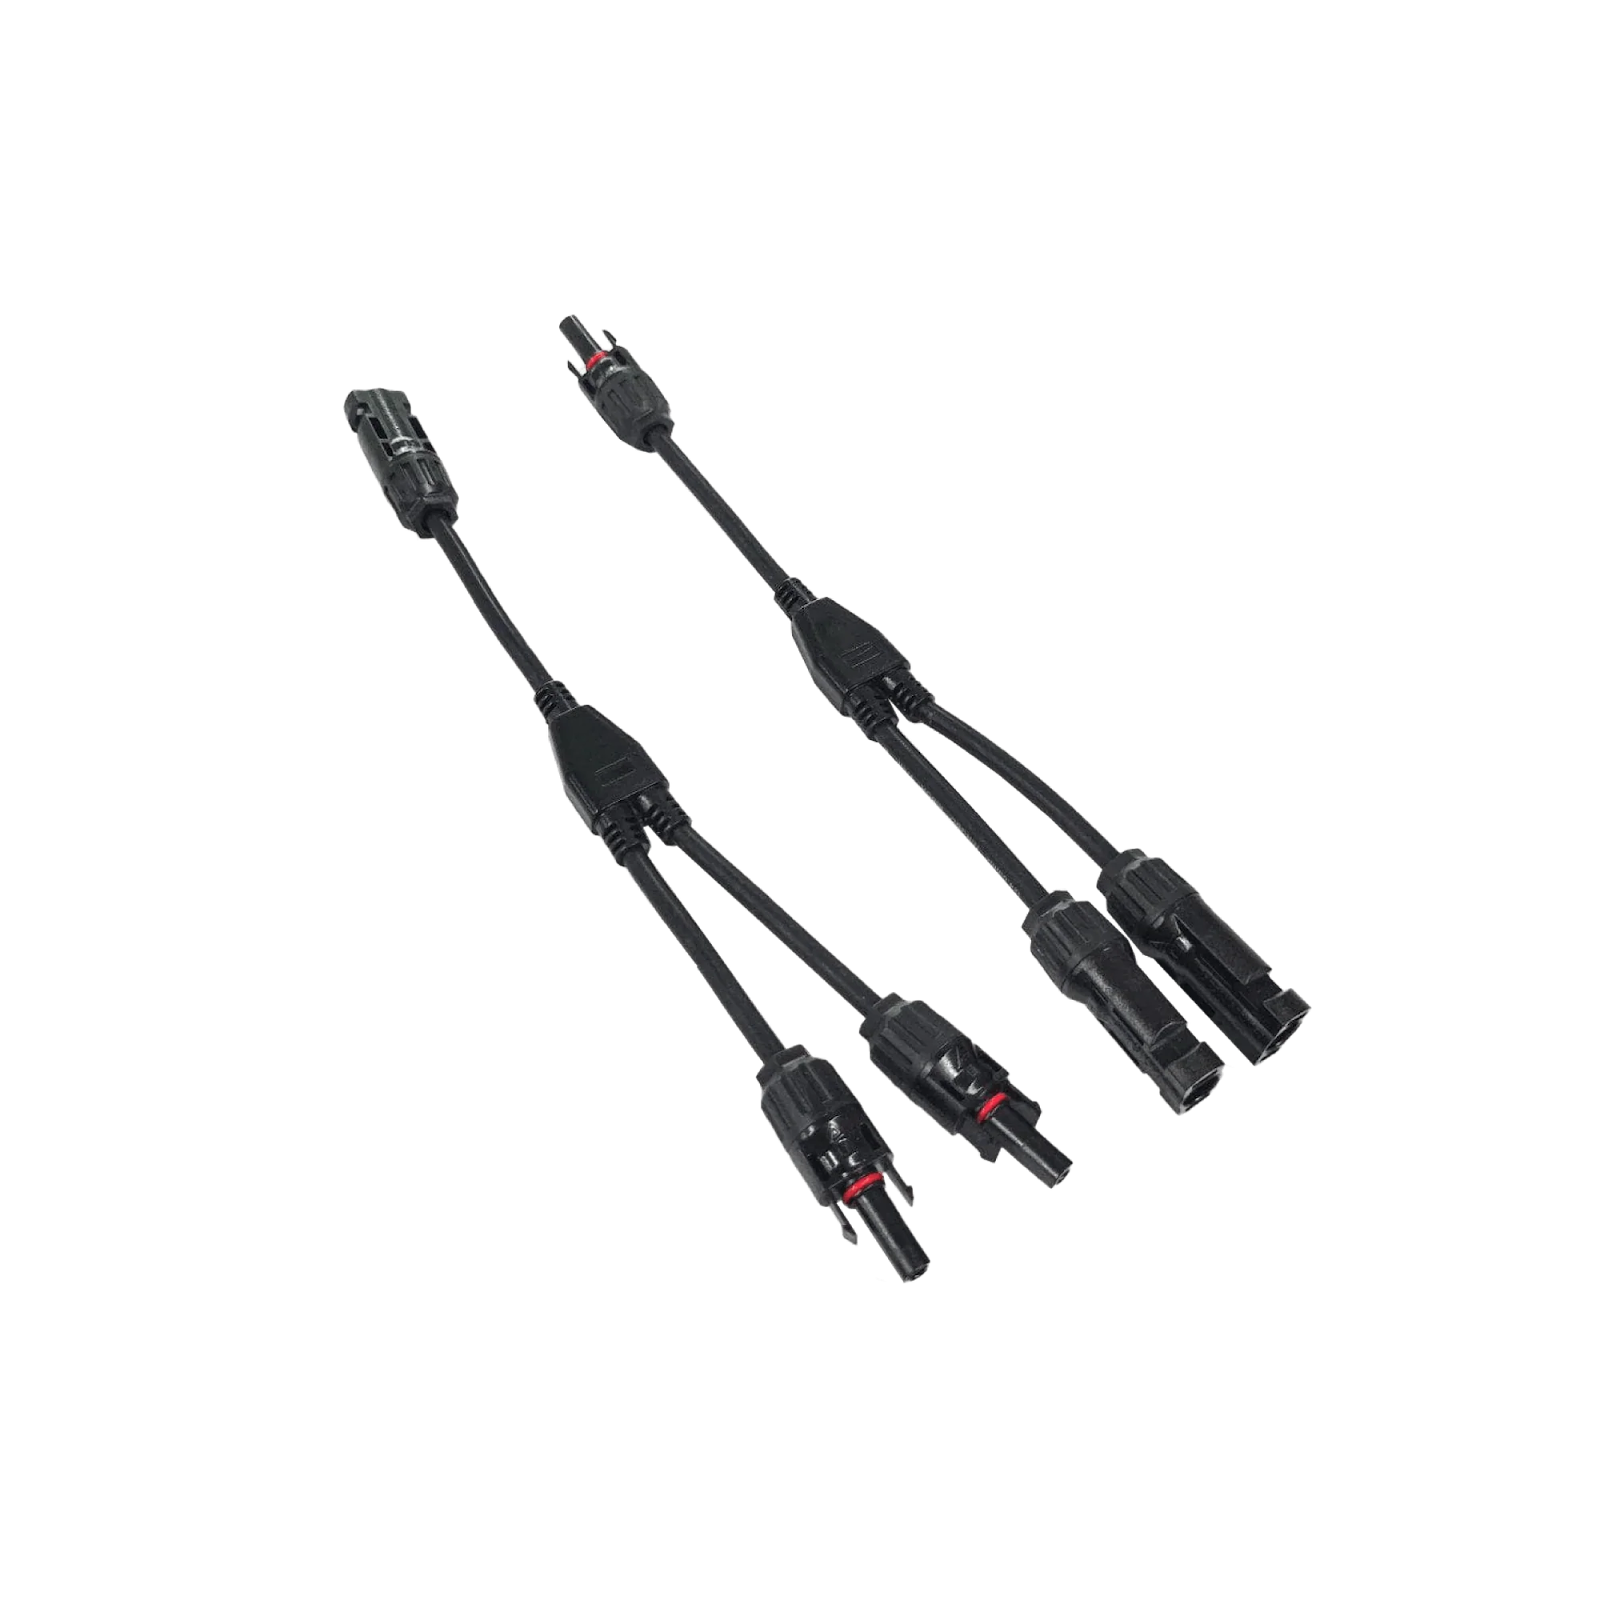 If you’re wiring the panels in parallel, you also need solar parallel connection cables.
Step 5: Connect Solar Panels to Your Portable Power Station (Inverter)
Once your solar panel array is connected in series or parallel, you have one final connection to make.
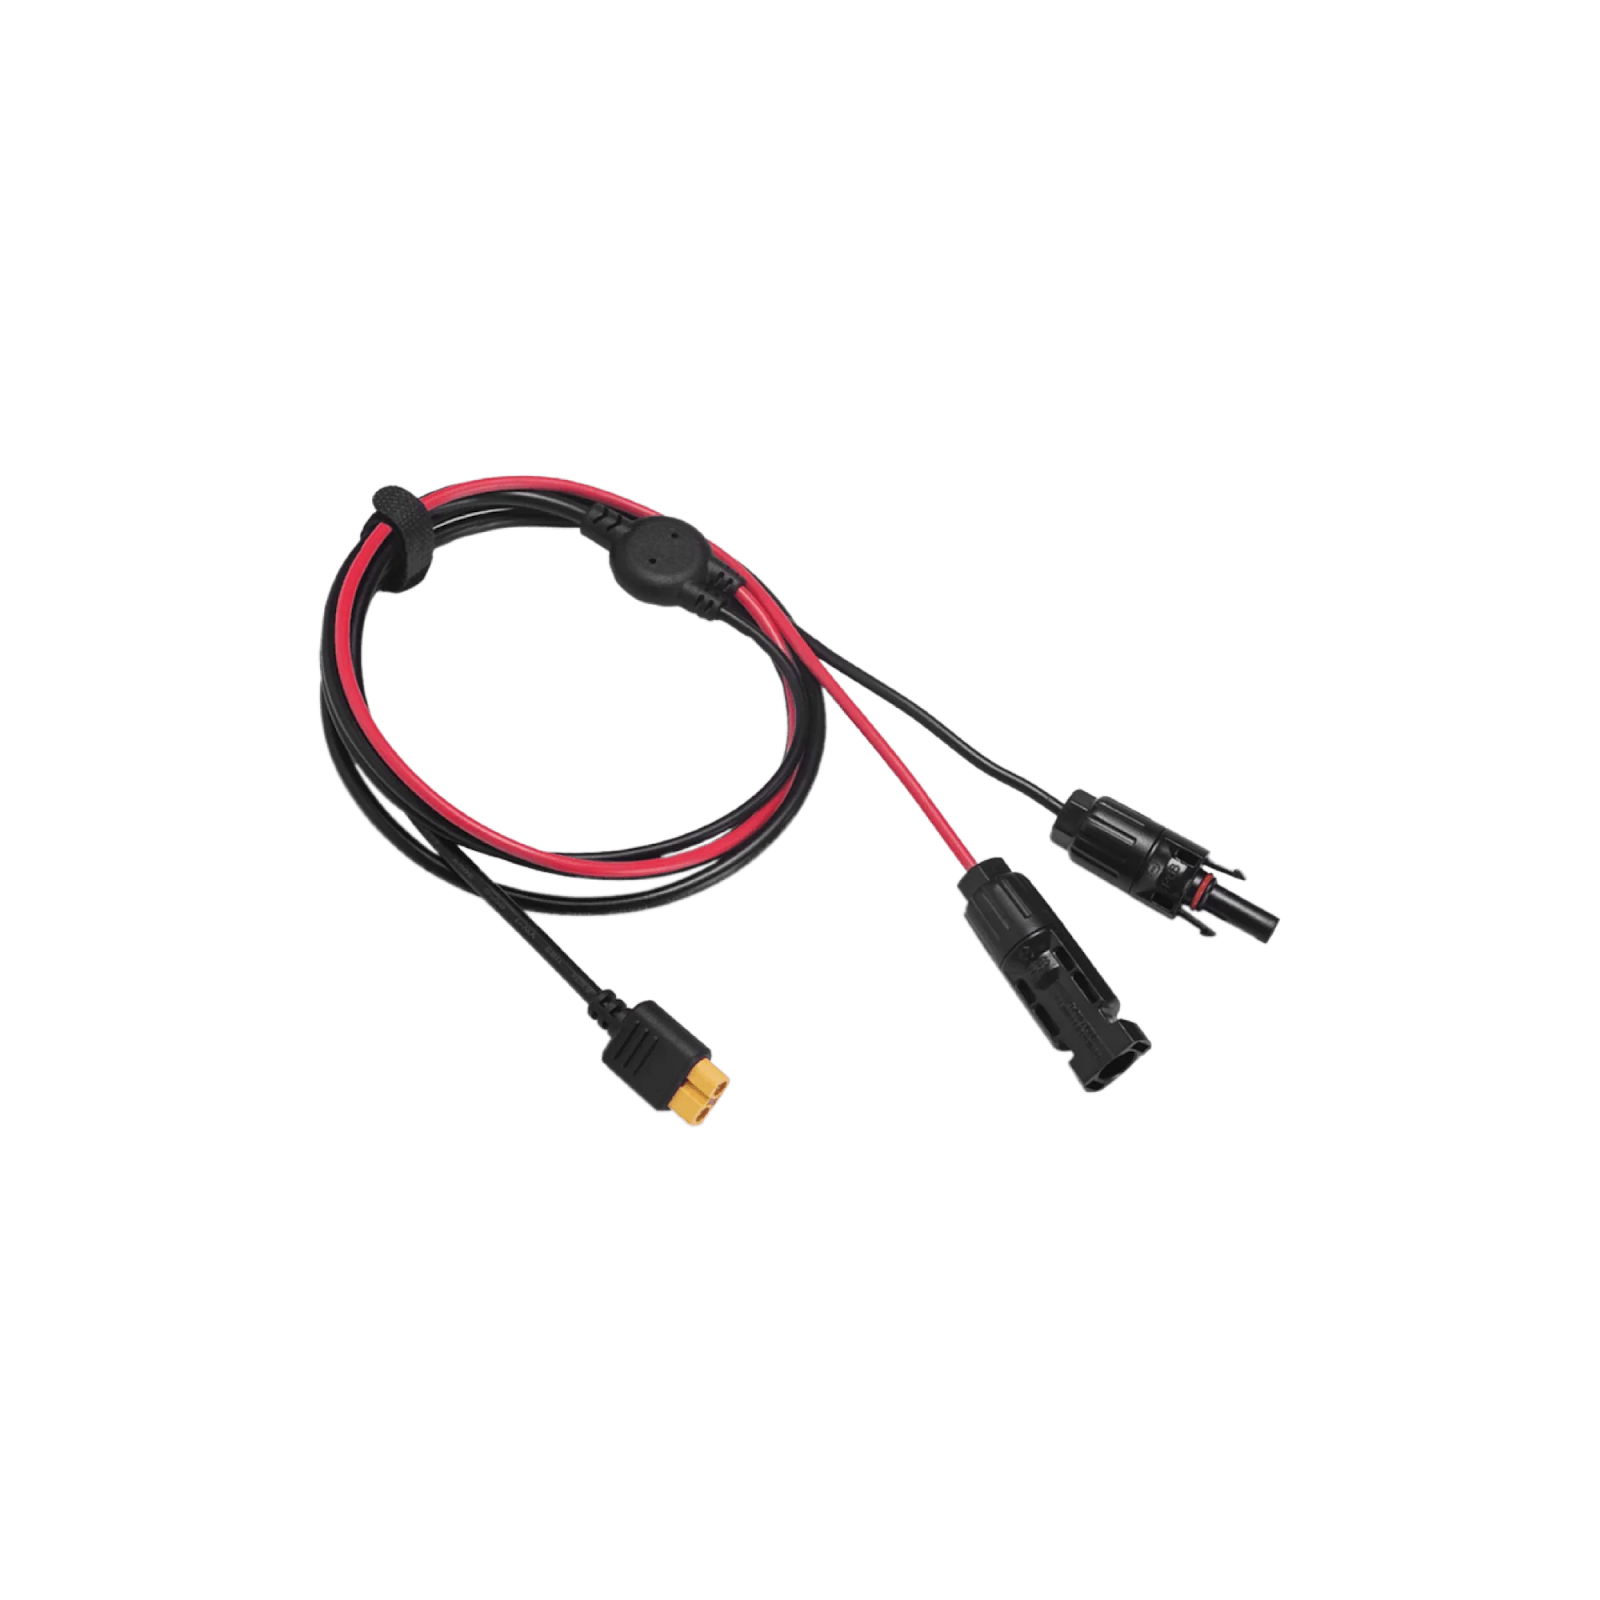
Using an EcoFlow Solar to XT60/XT60i Charging Cable, connect the panel closest to the EcoFlow DELTA Pro portable power station. The EcoFlow DELTA Pro is not waterproof and must be sheltered in weatherproof conditions. The XT60/XT60i Charging Cable comes in 3m and 5m lengths. If your cable run is longer than 5m, you will need an extension cable.
Remember to keep the distance between the closest panel in your array and the EcoFlow DELTA Pro as short as possible. The longer the cable, the more electricity will be lost in transmission. The shorter the connection, the more efficient it will be.
Now, just plug the XT60/XT60i charging end of the cable into your EcoFlow DELTA Pro.
Congratulations, you’re good to go.
Step 6: Test Your Residential Solar Power System for 3 Days to 1 Week
EcoFlow DELTA Pro has multiple inputs and outputs — both for charging and for directly plugging in home appliances. Inputs include AC, USB-C, DC, and Solar — you can even buy an EcoFlow EV X-Stream Adapter that allows you to power up at electrical vehicle charging stations.
Depending on your use case, connecting the EcofFlow DELTA Pro to your home circuitry is not essential, but if seamless home backup is your goal, you will want to take the next step.
Step 7: Connect Solar Panels to Your Home Circuit Board and Wiring
Integrating an EcoFlow DELTA Pro and your 400W rigid solar panels to your home circuit board and wiring is simple — for a licensed electrician.
Every step up until this point has been well within the capabilities of the average handyperson. Working with high-voltage electrical circuits is not.
Under no circumstances should you attempt to connect EcoFlow DELTA Pro to your home electrical system on your own.
You must use a licensed electrician. If you don’t, you may be breaking the law, and you’re certainly putting your life and the safety of your home at significant risk.
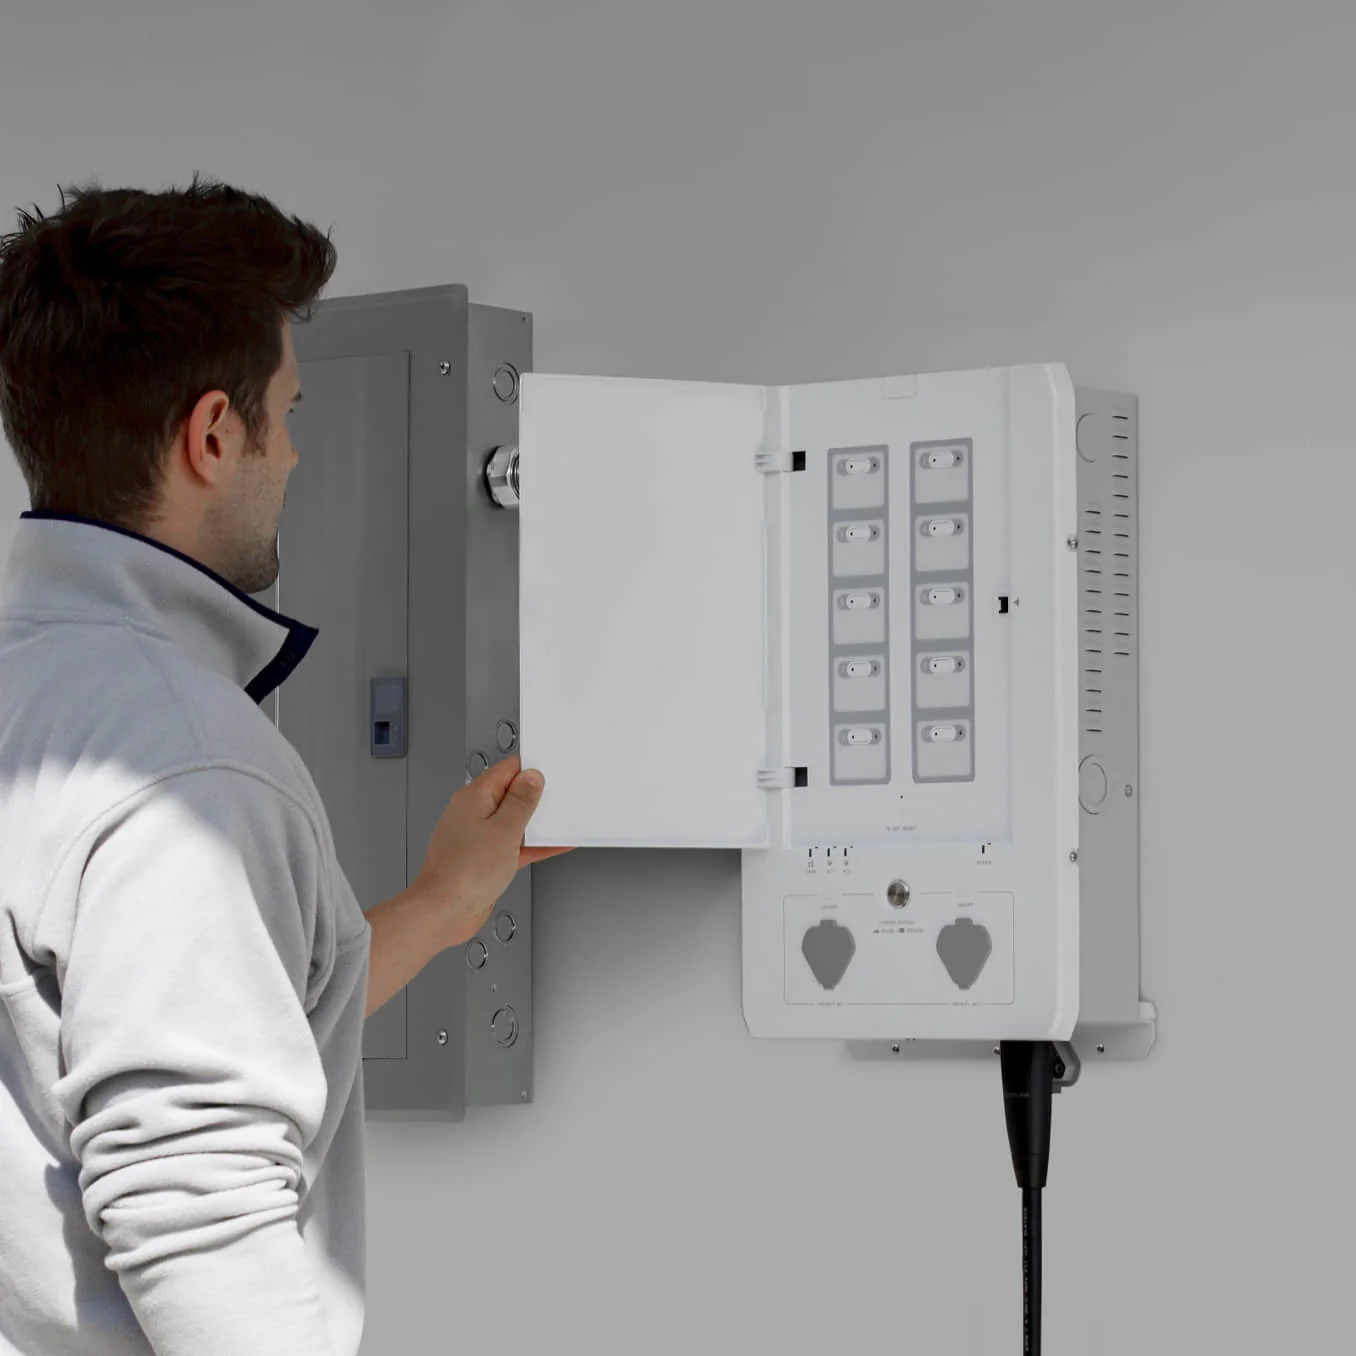
The good news is it’s a relatively quick job for a professional. First, you’ll need to purchase a transfer switch or EcoFlow Smart Home Panel.
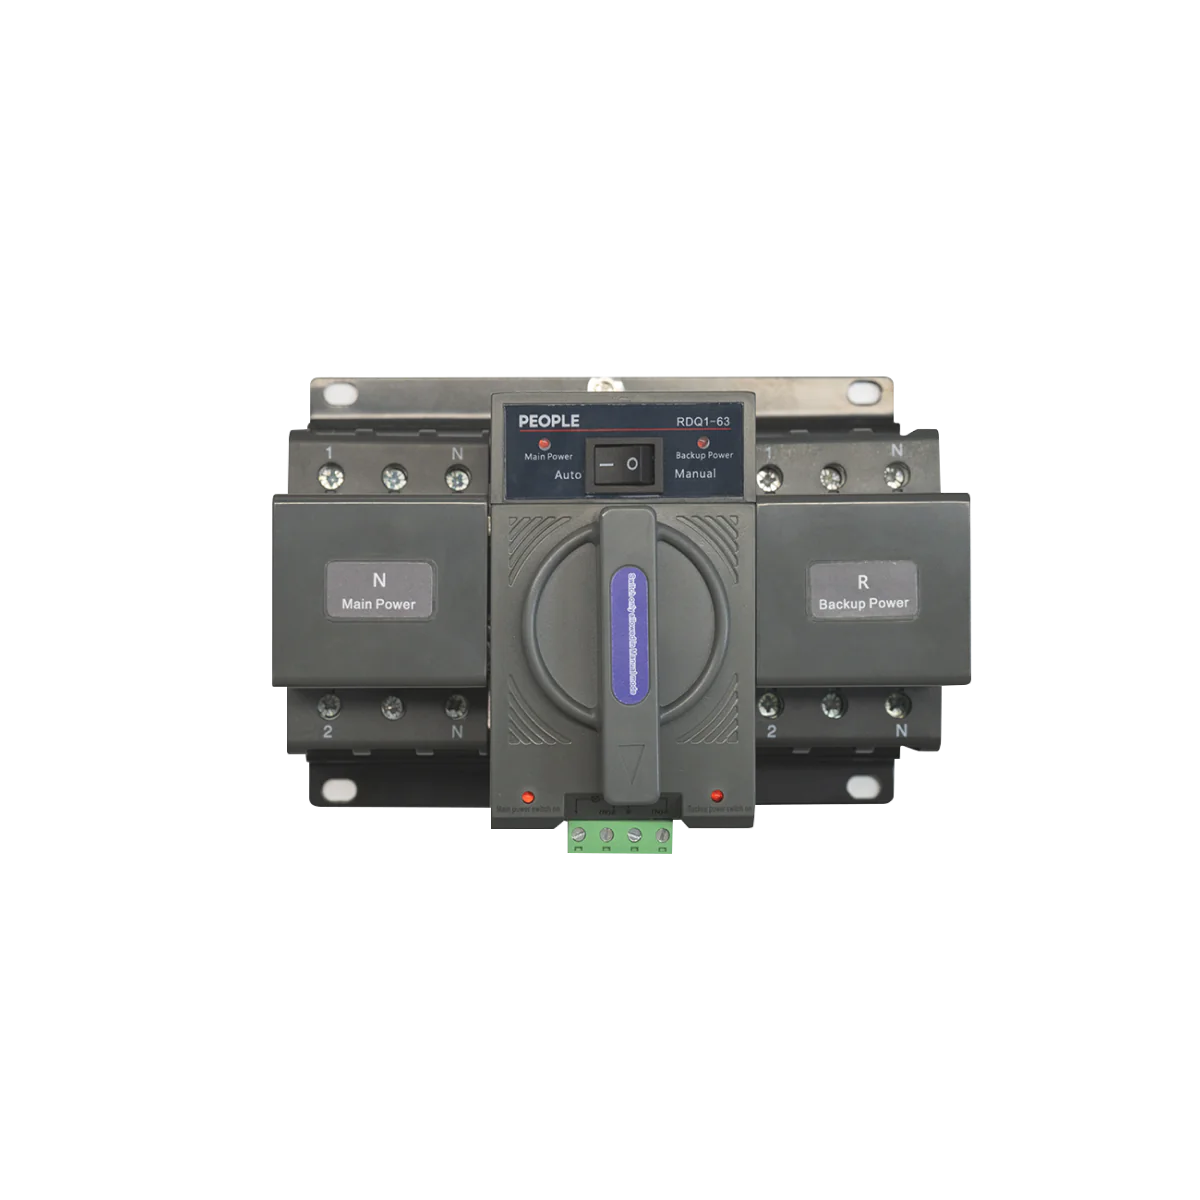
A transfer switch is a device that switches a load between on-grid power and home backup power. The electrician will integrate the transfer switch with your main circuit panel. Then, you simply plug in the EcoFlow DELTA Pro for instant home backup (Transfer Time 1~2s).
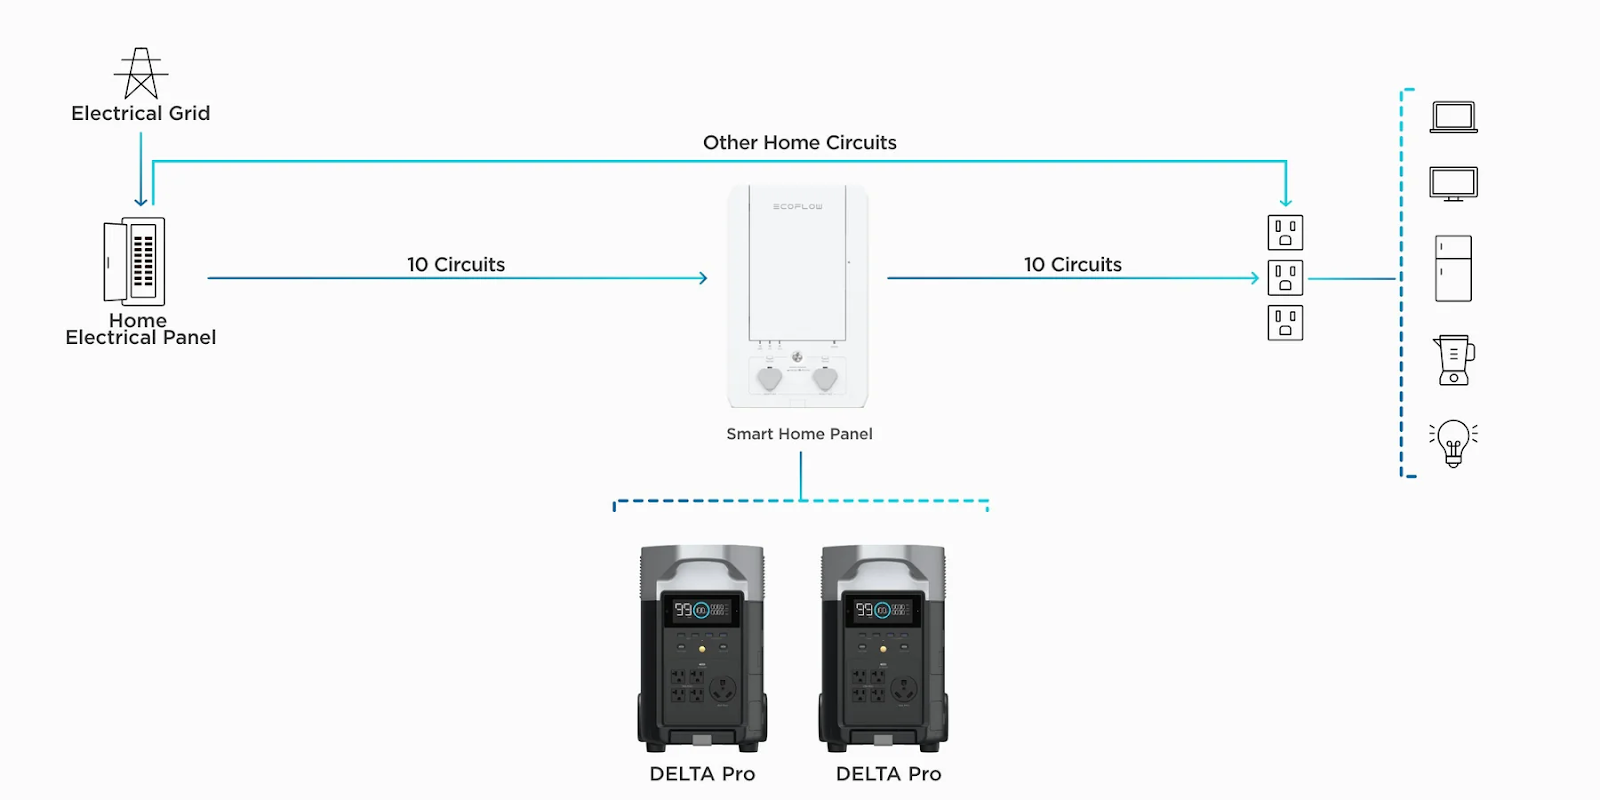
A transfer switch more than gets the job done. But if you want to take control and optimization of your home backup system to the next level, consider the EcoFlow Smart Home Panel. It gives you unprecedented monitoring and control of your home backup solar power system — from anywhere with an internet connection.
When the grid is operational, you can connect up to 2 x EcoFlow DELTA Pros and get up to 3400W of fast-charging power. Adding a second EcoFlow DELTA Pro allows you to double your solar input capacity to 3200W and install up to 8 x 400W solar panels.
Remote control and extensive customization options through the EcoFlow smartphone app mean you can minimise your electricity consumption from Eskom. And — Always be prepared for load-shedding and unplanned blackouts.
Frequently Asked Questions
No. Connecting solar panels in serial or parallel does not impact how much wattage they produce in laboratory conditions. Connecting solar panels in parallel increases amperage and keeps voltage constant. Series connections produce higher voltage while maintaining amperage, regardless of how many panels you use. Depending on external factors, either method may be optimal. For large residential installations, a hybrid serial-parallel wiring plan is often best.
In small systems, e.g., two solar panels and a portable power station for a motorhome, connecting panels in parallel will likely result in slightly faster recharge times. A series or a hybrid of series-parallel connections might be optimal for whole-home battery backup. Which wiring method provides the shortest charging time for solar batteries is not dependent on whether it’s series or parallel – it’s dependent on external factors.
If you connect two identical solar panels together in series or parallel under laboratory conditions, the electricity output using either method will be virtually identical. Neither wiring method is “better,” only optimal for your specific application and external conditions. A hybrid series-parallel wiring plan made and executed by a professional installer is likely to yield optimal production for large residential solar installations.

Final Thoughts
Energy insecurity in South Africa is a daily reality that will seemingly never change.
Backing up your home with a clean, renewable solar power system can help ensure that your family never has to suffer without electricity during load-shedding or blackouts ever again.
EcoFlow’s rigid solar panels are simple to connect, install, and plug into the EcoFlow DELTA Pro. There’s no fussing around with separate components and compatibility issues.
EcoFlow has a wide range of solar panels, Power Kits, and portable power stations to suit your household needs.