Curious about how to connect solar panel to battery? Well, you are in the right place! Solar energy is truly amazing and has so many benefits, especially when you pair your panels with a battery. This combo will help you save on energy costs and guarantee a secure backup during those cloudy days. But hey, don’t worry if this sounds a bit technical. We are here to guide you through the process with a step-by-step approach. We will also touch on safety considerations and some handy tips to get the most out of your solar setup. Let’s get started on this sunny journey now!
How Do You Connect a Solar Panel to a Battery: Step-by-Step
Learning how to wire a solar panel to a battery is easier than you think. With just a few tools and the right steps, you’ll have your system connected and running in no time.
Before we start, make sure to prepare the following components first:
✔ Solar panels
✔ Solar charge controller (PWM or MPPT)
✔ Deep cycle battery (preferably lithium, such as LiFePO4)
✔ Inverter (if running AC-powered appliances)
✔ Wiring and connectors
Got everything ready? Great—let’s walk through the steps!
Step 1: Mount Your Solar Panels
The first step in hooking up solar panel to battery is to mount them securely in a location that receives optimal sunlight exposure. The positioning of your panels significantly affects their efficiency, so it’s crucial to angle them correctly. If you’re installing fixed solar panels, take extra care in choosing the right orientation, as they can be difficult to adjust once installed.
Take note of the geographical location, time of year, and potential obstructions when determining the best angle for your panels. In general, PV panels should face south in the northern hemisphere and north if it’s in the southern hemisphere, with an angle roughly equal to your latitude.
Step 2: Organize the Solar Charge Controller and Battery
A solar charge controller is vital to regulating the energy flow from your PV solar panels to the battery, preventing overcharging and maintaining optimal battery performance. Most solar panel setups use a standard 12V battery, but regardless of your battery’s voltage or capacity, always use a charge controller between the panels and the battery.
There are two main options for solar charge controllers: PWM (Pulse Width Modulation) and the popular MPPT (Maximum Power Point Tracking). MPPT controllers are more efficient and give off advanced features like LCD screens for easier monitoring, but they also tend to be more expensive.
To set up the charge controller and battery, follow the manufacturer’s instructions carefully. Connect the battery to the charge controller. Make sure that the positive (+) and negative (–) terminals are perfectly matched. If you’re using a lithium battery, such as a LiFePO4, check if your charge controller is compatible and has the appropriate settings for your specific battery chemistry.
Step 3: Test Your Solar Charge Controller
Once you’ve connected the charge controller to the battery, turn it on to verify that it’s functioning correctly. If you’ve opted for an MPPT controller with an LCD screen, you can easily monitor the system’s performance and fix/troubleshoot any issues that may arise.
Step 4: Connect Your Charge Controller to the Solar Panels
With the charge controller and battery set up, it’s time to connect the solar panels to the charge controller. Refer to the manufacturer’s instructions for the specific wiring process, as it may vary depending on your controller and panel configuration.
At this stage, you should also consider whether you need to install a power inverter. Solar panels generate direct current power, which is suitable for charging batteries but not for running most household appliances that require alternating current power. An inverter transforms the DC power stored in your battery to AC power, allowing you to run a wider range of electronics.
When choosing an inverter, make sure that it’s compatible with your battery’s voltage and has sufficient wattage to handle the maximum load of your connected appliances.
Step 5: Finalize the System
After connecting all the components, double-check your wiring to see if everything is secure and correctly connected. Organize and label your wires for easy identification and future maintenance.
Before fully using your home battery backup system, it’s a good idea to monitor its performance for a few days to ensure that everything is working as expected. Keep an eye on your battery’s charge level, the power output from your panels, and the overall system efficiency.
If you encounter any issues or have concerns about your setup, consult with a professional solar installer to troubleshoot and optimize your system.
Safety Considerations When Connect Solar Panels to Battery
When working with solar panels and batteries, prioritize safety to avoid potential hazards. Follow these safety guidelines:
- Always wear protective equipment/gear, such as gloves and safety glasses, when handling hazardous electrical components.
- Disconnect the PV solar panels from the battery and charge controller before performing any maintenance or adjustments.
- Make sure that all wiring is properly insulated and away from moisture and physical damage.
- Install appropriate fuses and circuit breakers to protect your system from electrical surges and short circuits.
- Follow the manufacturer’s guidelines and local electrical codes throughout the installation process.
Tips for Maximizing the Efficiency of Your Solar Panels and Battery
To get the most out of your solar panel and battery setup, take note of the following tips:
- Keep your panels clean. Regularly clean your PV solar panels to remove dust, dirt, and debris that can block sunlight and reduce efficiency.
- Watch your battery charge. Try not to let your battery’s charge drop below 50%. This helps protect and extend its overall lifespan.
- Use energy wisely. Even with a solar generator at home, it’s smart to use energy-efficient appliances and LED lighting to lower your overall consumption.
- Inspect regularly. Check your entire solar system for signs of wear, damage, or loose connections, and address any issues early to avoid bigger problems.
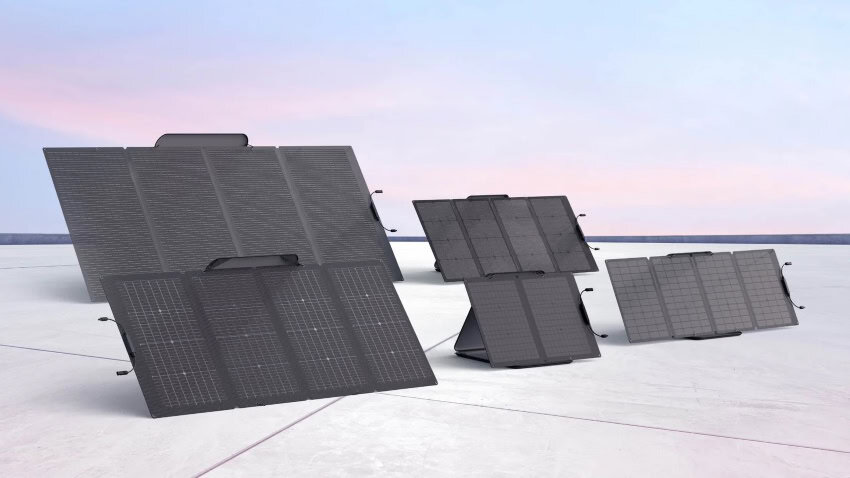
- Choose quality solar components. If you’re planning to choose solar power system, prioritize high-efficiency panels that are built to last. For instance, the EcoFlow 400W Portable Solar Panel delivers a powerful 400W input with a 23% conversion rate. It’s also built for durability, featuring an IP68 waterproof rating to withstand everything from heavy rain to dry, dusty conditions—perfect for long-term outdoor use.
- Pick the right battery. For optimal performance and safety, invest in a high-quality, deep-cycle battery. Among the types of solar batteries, LiFePO4 batteries stand out for their stability, long life, and consistent power delivery, making them a smart match for your solar setup.

Conclusion
Indeed, knowing how to connect solar panels to batteries is a smart investment that can help you make the most of your renewable energy system. Simply follow the easy steps provided in this guide, take the necessary safety precautions, and enjoy all the benefits of solar power both day and night. So, go ahead and take the plunge—make both your wallet and the environment proud!
FAQs
Can I connect a solar panel directly to a battery?
While it is possible to connect a PV solar panel directly to a battery without using a charge controller, it is not recommended. Without a charge controller to regulate the flow of electricity, the solar panel may overcharge the battery, leading to heat buildup and potential damage.
How to hook up a solar panel to a 12V battery?
To safely link a solar panel to a 12V battery, a solar charge controller is a must-have. Start by locating the positive side and negative terminals on the panel and battery, then attach the corresponding wires from the PV panel to the controller’s terminals.
Afterward, connect the battery’s wires to their respective terminals on the controller. This configuration enables the controller to manage the electrical current between the panel and battery, optimizing charging efficiency and prolonging the battery’s lifespan.
How long will a 200 watt solar panel take to charge a 12V battery?
The time it takes for a 200 watt PV panel to charge a 12V battery depends on the battery capacity, initial state of charge, and the amount of sunlight available. Assuming a 100Ah battery at 50% depth of discharge and an average of 5 hours of direct sunlight per day, a 200 watt solar panel would take approximately 3 hours to fully charge the battery. However, this is an ideal scenario, and actual charging times may vary based on real-world conditions.


